Step-by-Step E46 3-Series BMW Sunroof Repair
One night, while driving my 2000 E46 3-Series BMW 323i, I tried to open my sunroof, and heard an omnious loud crunch; it sounded as if my sunroof had self-destructed. In the aftermath, I found that the sunshade was suddenly loose, and had jumped its tracks...
I was too busy to inspect it and figure out how to fix it for over a year, but after I lent my car to a friend, without warning him not to open the roof, there was more crunching and damage, so enough was enough.
Although there are already a few writeups on the Internet on how to do repair the E46 sliding sunshade, I ran into several gotchas during my repair, which were not adequately addressed in the how-to's that I read. Therefore, I present my version of the step-by-step procedure below.
Step 0: Gather needed tools
Tools needed:
- Torx T-25 driver
- Torx T-10 driver
- nabbergrabbers (optional)
If you don't know what nabbergrabbers are, here is an example

Nabbergrabbers
They're great for fishing stuff out of tight spaces. When you push on the green end of the handle, jaws open up on the other end:
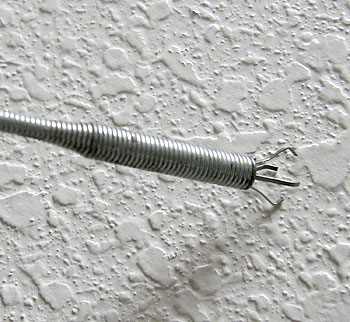
Nabbergrabber Jaws
This tool is quite handy for fishing parts out of the sunroof's narrow cavity.
Below is an exploded view of the sunroof assembly from the ETK:

Exploded view of sunroof assembly
The image is from ReadOEM.com, a website which has the whole ETK online. Here is the direct link to the 2000 323i sedan sunroof: ETK - sunroof.
The sliding sunshade "design" on the E46 Bimmers is so awful that I hesitate to even legitimize it by calling it a "design;" It's more like an afterthought. To access the sunshade assembly, you must first remove the sunroof glass.
Step 1: Remove Glass
Open the roof to the tilt-forward position (press the sunroof button upwards instead of sliding it). Slide the sunshade as far back as it will go. From inside the car, locate and remove the T-25 torx screws which secure the glass; there are 3 on each side.
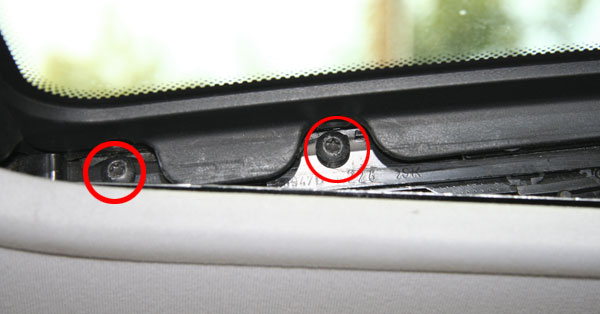
Roof screws (front)
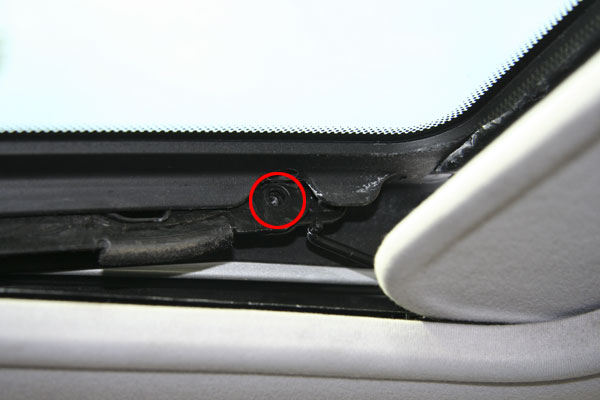
Roof screw (rear, screw already removed)
Carefully lift off the glass, and put it in a safe place. (My son actually stepped on mine while it was on the ground... luckily, he's too light to break it, but I almost had a heart attack!).
Step 2: Inspect Damage
Once the glass is off the car, you can inspect the sunshade guides from the top of the car. On the passenger side, there are 2 metal clips embedded into the sunshade, which snap into tiny black plastic guides (RIGHT SLIDING PIECE (17) in the ETK diagram, above), which in turn sit inside a narrow track. My plastic guides had long fallen off and disappeared, leaving only the metal.
Passenger side bare metal clip
On the driver's side, there are rectangular metal clips, tipped in plastic and rubber, held in by T-10 Torx screws. These clips (RIGHT SLIDING PIECE (16)) are larger than on the passenger side, because they are used to automatically slide the sunshade fore/aft when you open/close the roof. Mine were completely chewed up. I forgot to take a photo while they were in the car, but here is what they looked like after I removed them:

Chewed up driver side clips
Remove the two LEFT SLIDING PIECE by taking out the 2x Torx T-10 screws on each one.
From the driver's side, carefully lift off the sunshade from the top of the car. Make sure your hands are clean! The sunshade stains very easily. Next, locate the sunshade "driver." This plastic-tipped piece of metal pushes against the metal/plastic clips described above, and moves the sunshade fore/aft.
Sunshade "Driver"
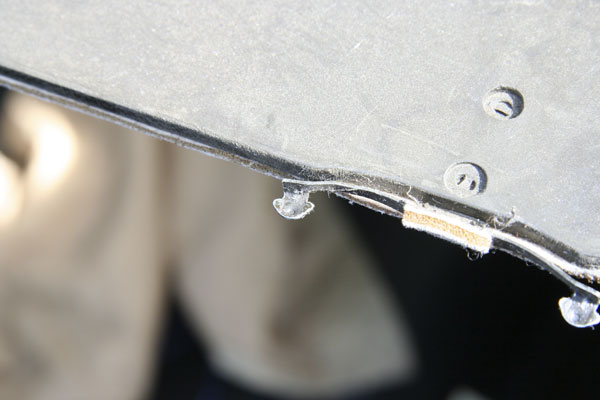
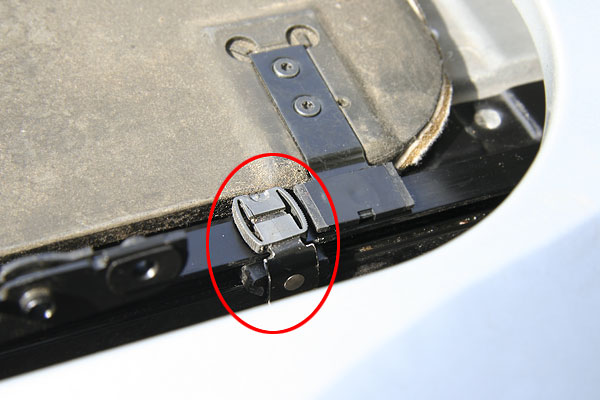
The photo above depicts the sunshade driver in its proper location. In my case, mine had been pushed deep into the bowels of the sunroof cavity. To get access to the sunroof cavity, you must first remove the popup metal piece with bent rubber edge, which I will call the "wiper", for lack of a better term, located at the rear of the sunroof hole in the roof. It isn't depicted in the ETK diagram above, unfortunately, because it's only available as part of a repair kit (REPAIR KIT SLIDING HEADLINER (22)). As far as I can tell, the "wiper" is what keeps rain out of the roof when you open it to the tilt-up position in the rain. Sorry, I neglected to get a photo of it while it was in the car, but it's held on w/ locking pins on each side of the car:
Passenger side locking pin
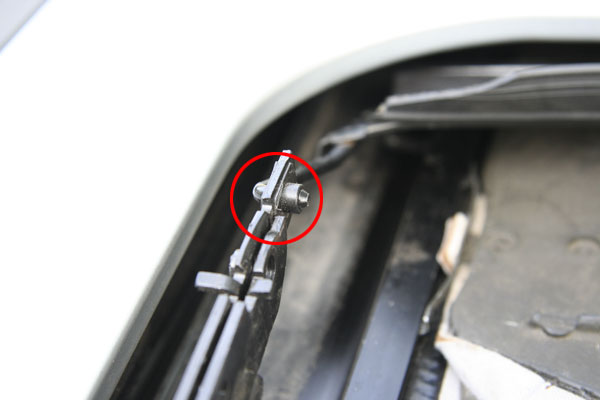
Driver side locking pin
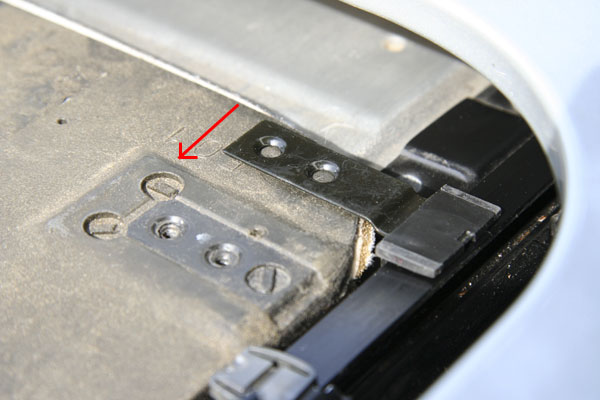
After popping out the locking pins, carefully pull it forwards, and lift it out on the passenger side via the cutout in the passenger side of its track:
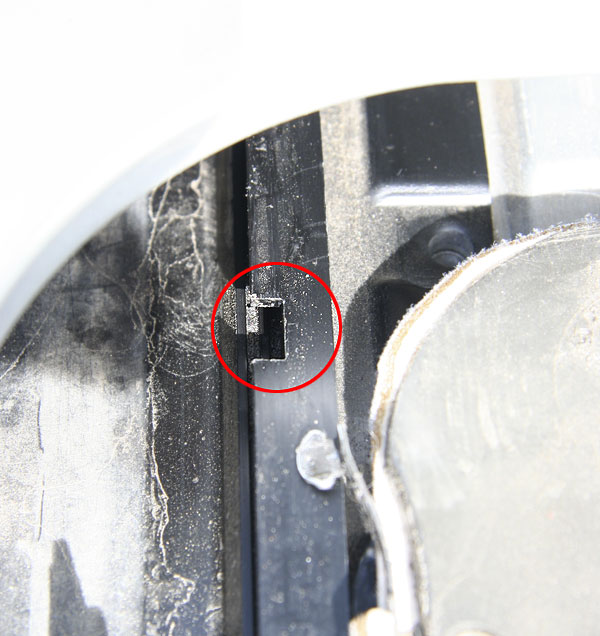
Rear Wiper Track Cutout
Once you've disengaged it on the passenger side, you can unhook it on the driver's side of the car. Here is what it looks like removed from the car:

Rear Wiper (top view)
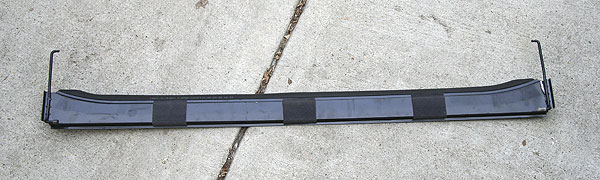
Rear Wiper (bottom view)
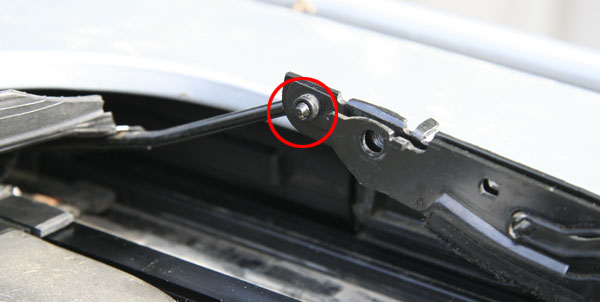
It's not depicted in the exploded diagram, because it's available only as part of the REPAIR KIT SLIDING HEADLINER (22). The metal rods on both sides of mine were completely bent out of shape, and the ends of the sheet metal were completely mangled. Luckily, I was able to bend it back into reasonable shape. The guide pins which sit in the track are supposed to have plastic tips, which prevent metal-to-metal contact when the wiper slides:
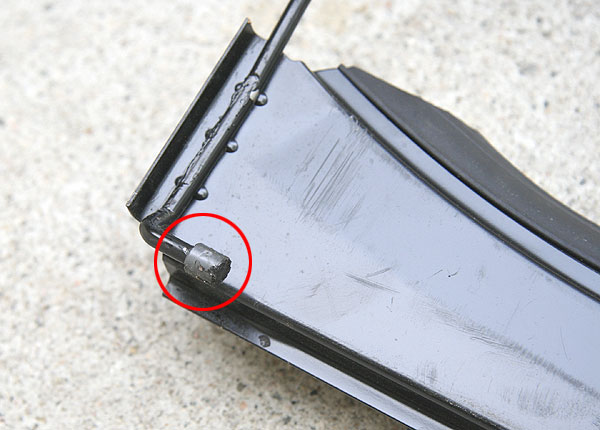
Guide Pin Tip
In my case, the one on the driver's side was missing (probably disintengrated). Not wanting to buy a whole repair kit, I improvised by wrapping the tip with tape. Who knows how long it will hold up:
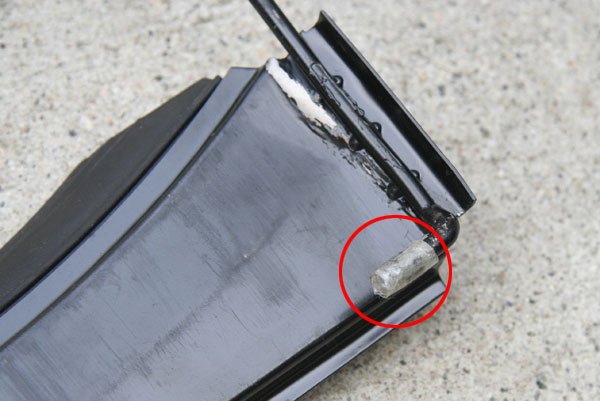
Improvised Guide Pin Tip
Now that the wiper is out of the car, you have an unencumbered view into the sunroof cavity. Use a flashlight follow the track on the driver's side back into the car to find the sunshade "driver." Unless you have tiny hands, it's impossible to reach into the cavity to fish out the "driver." Here's where the nabbergrabbers come into play. I gripped the "driver" with my nabbergrabbers, and pulled it forwards. Inspect the sunshade "driver" for damage. The plastic can crack and fall off. In my case, the metal had gotten bent, and it was tilted vertically, rather than riding parallel w/ its track. Do not attempt to bend it by gripping the plastic!! I cracked mine that way, but luckily, it didn't break off. If it needs to be bent back into shape, grab the *metal part* w/ some needle nose lockjaws. If the plastic is broken off, you will have to purchase the very expensive REPAIR KIT SLIDING HEADLINER (22).
Step 3: Obtain Replacement Parts
At this point, you will know what replacement parts you need. Prepare yourself for sticker shock before heading to your BMW dealer! Here are the parts I needed
(2) SLIDING PIECE LEFT (16) 54-13-8-246-027 $12.04 each
(2) RIGHT SLIDING PIECE (17) 54-13-8-246-025 $15.96(!!) each
I paid $60.62 total for these %$#$% tiny parts! Can you believe the RIGHT SLIDING PIECE .. that tiny piece of plastic costs $16 each??!! It must cost <$1 to make! The reason I opted not to replace the wiper is because REPAIR KIT SLIDING HEADLINER(22) costs $120. I figure if mine starts having problems again, I'll just remove it, and stop opening my roof in the rain.
Step 4: Reassembly
It's a bit tricky to reinstall the sunshade. At first, you might think of just attaching all the sliding pieces, but if you do, then you won't be able to fit the sunshade into its tracks. First using a T-10 Torx, remove the two SLIDING PIECE LEFT (16) from the driver's side of the sunshade. Do not install the new ones yet.. if you do, you won't be able to fit the sunshade into its track later. Next, fit the two SLIDING PIECE RIGHT (17) to the metal clips on the passenger side of the sunshade. Note that only one side of the SLIDING PIECE RIGHT has holes. When installing, must be oriented with the holes facing the bottom (interior) of the sunshade, so that the little bump on the bottoms of the metal clips can poke through them.
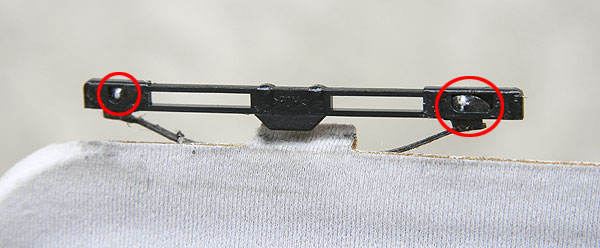
Installation of Slide Piece Right
I have circled the holes in the photo above, where the metal bumps poke out. Operate the sunroof so that it's in the fully closed position... the glass-holding metal parts will rotate downwards so that they're flush w/ the other parts. This position allows the sunshade "driver" to go to its furthest forward position. Push the "driver" as far forwards as it will go. Engage the SLIDING PIECE RIGHT into their track on the passenger side of the sunshade, and then lower it down on the drier's side. The driver should be positioned so it's between the screw holes which attach the two SLIDING PIECE LEFT. There isn't enough clearance to get the pieces on before lowering the sunshade.. you must instead, slide them in along the track from each end of the sunshade:
Rear SLIDING PIECE LEFT Installation
Front SLIDING PIECE LEFT Installation
Install the supplied T-10 Torx screws to fasten the two SLIDING PIECE LEFT. Next, reinstall the rear wiper. First, operate the sunroof switch to the tilt-up position. Hook the passenger side of the wiper into its track behind the sunshade "driver" ... it must go behind it, or mayhem will break out when you try to operate the roof. Next, slide it into the notch in its track on the passenger side, slide it backwards, and finally, snap the locking pins into the rear of the metal pieces which hold the glass. (Refer to the Locking Pin photos above). Make sure to insert them firmly until they "snap." I forgot that they had to snap in, and only put them in loosely. Much to my chagrin, the first time I tried to operate the roof, they slipped out, and my wiper got so mangled up that remaining plastic tip on the passenger side broke off, and I had to use the tape improvisation on that side as well.
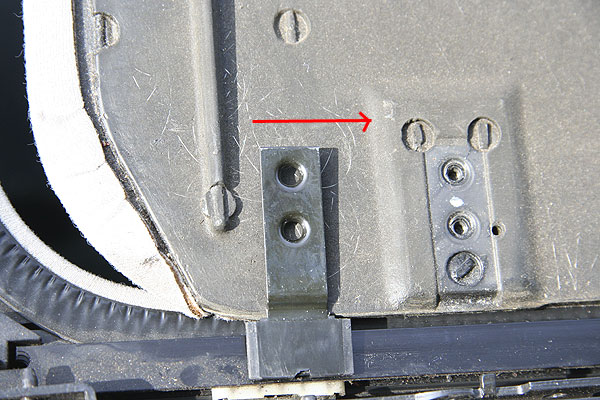
Now that the sunroof is fully assembled, except for the glass, make sure all the pieces are where they should be. Be especially sure that (1) the sunshade driver is between the two SLIDING PIECE LEFT:
"Driver" goes in front of rear SLIDING PIECE LEFT
and (2), the guide pin for the "wiper" sits behind the SLIDING PIECE LEFT.
Before reinstalling the glass, test the operation of the mechanism. This is the scary part. Keep your fingers crossed, and be careful! Pulse the sunroof switch instead of letting it go into the automatic position where it keeps operating until it hits the end of its travel. Be prepared to reverse the switch quickly if you hear any binding or grinding noises as the roof is moving. My roof motor made horrible grinding noises when the roof reached the open position. It turns out that my motor had somehow jumped its worm drive so that its fore-aft setting was off. I was surprised... the motor has an electronic control board attached to it, but it still must be manually adjusted. Hopefully, you will be more fortunate, and will not have to adjust the motor.
If none of the pieces broke off when you test-operated the motor, and you didn't hear any horrible noises, you can now replace the glass. Operate the motor to the tilt-up position. Carefully lay the glass on top of its retaining tracks. The securing holes in the glass are oversized, so you can adjust the height. Operate the motor to the fully closed position, and adjust the glass so the front is flush w/ the roof, and the rear is elevated about 1-2mm above the setting for the front. It's easiest to install the T-25 screws loosely first, so they can hold the glass in place while you adjust the height and tighten them up.
If the glass will not adjust properly, or the sunshade will not close fully, then you will have to adjust the motor.
Here are some possible symptoms of a misadjusted motor:
- roof won't tilt up high enough in tilt-up position.
- glass can't be adjusted so it's level w/ the roof.
- grinding at the end of travel
- sunshade won't pull closed when the roof is shut, or go back far enough when the roof is open.
If you're lucky, and don't need to adjust the motor, skip to Step 6.
Step 5: Adjusting the Sunroof Motor
Adjusting the motor was the most time-consuming part of the job. To access the sunroof motor, first remove the access panel:
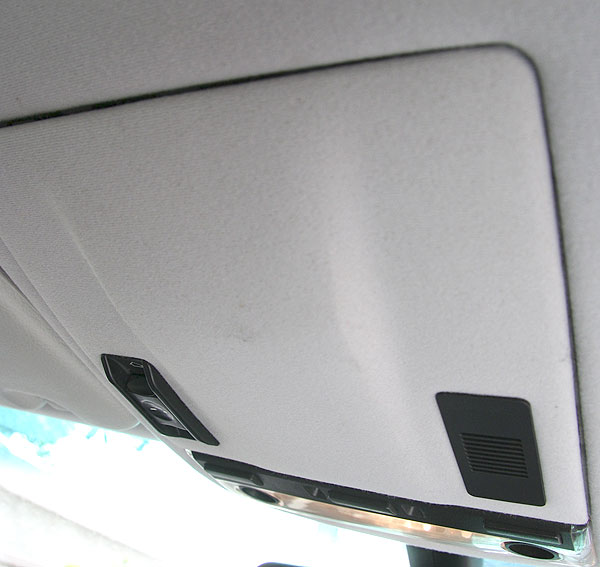
Sunroof Motor Access Panel
Once the access panel is off, the motor is exposed. It's held on by 3 T-25 Torx screws:
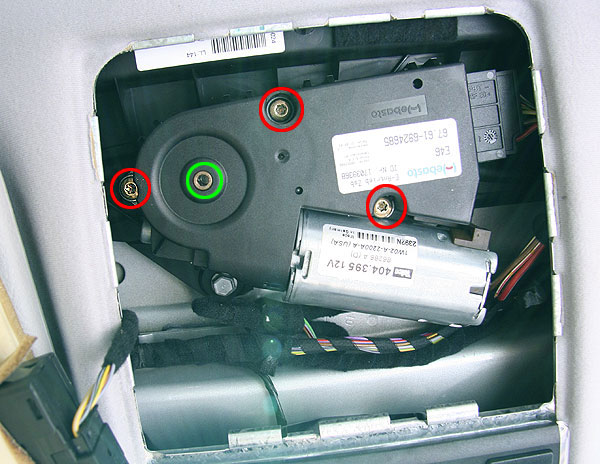
Sunroof Motor
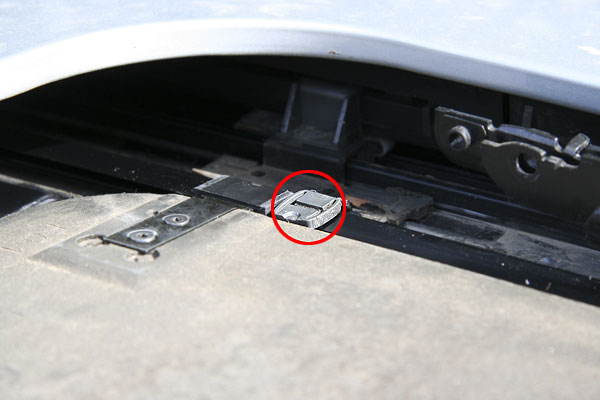
To adjust the roof motor, loosen the T-25 screws until its worm gear clears the sunroof drive gear, and then turn the motor a little (use the special bent allen wrench that's in the toolkit in the trunk of the car; engage it into its hole in the drive gear ... green circle in the photo), then tighten it up and test. After adjusting and testing many, many times, I finally got the motor adjusted properly. The motor rotates clockwise when opening, and counter-clockwise when closing. Therefore, if your roof won't open far enough, you must rotate the motor clockwise, and if it won't close all the way, rotate it counter-clockwise. When properly adjusted, the shade will slide completely closed when the glass is the closed position, and when it opens fully, you won't hear any horrible noises at the end of its travel.
Step 6: Position Sensing Recalibration
Finally, you must recalibrate the position sensing mechanism. This tells the electronic controller where the extremities of travel are in the various modes of sunroof operation. Operate the motor to the fully open position, and hold the switch on for about 20-30 seconds. Repeat for the fully closed and tilt-up positions.
Ah... finally done. Enjoy your repaired sunroof, and pray that it doesn't break again soon. All told, it took me about 7 hours of work over 2 days, much of which was spent learning how the mechanism worked, and figuring out a plan of action.
Links
Here are some other sources of info on DIY E46 sunshade repair:
Bimmer DIY
BMW Sunroof / Moonroof Repair
Sunroof Clip DIY
Another E46 DIY writeup by me:
HOWTO: Car2PC Install in 2000 E46 BMW 323i

FastCounter by bCentral